


Schneider LC1E180M5N is an AC 접촉기 belonging to the TeSys E series, primarily designed for controlling electrical loads such as motors.
Basic Information
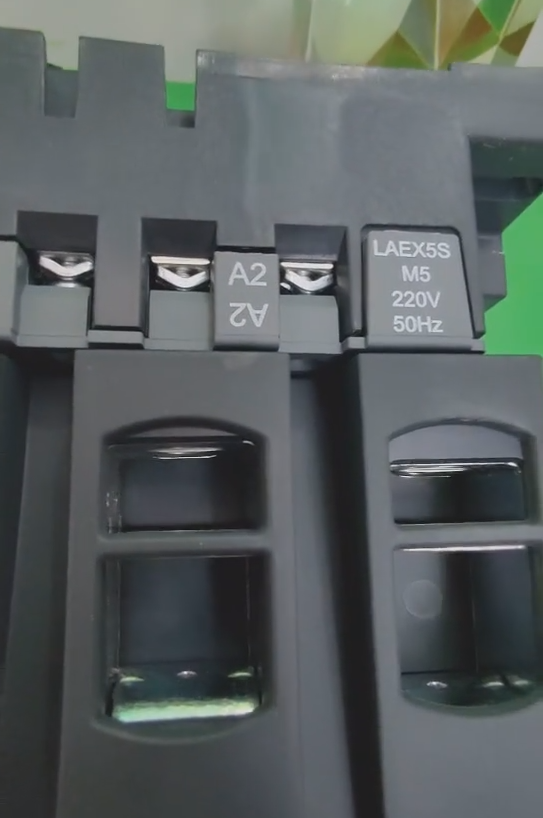
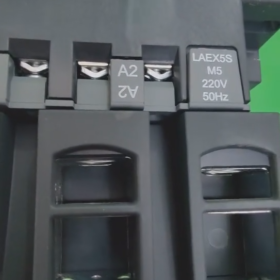
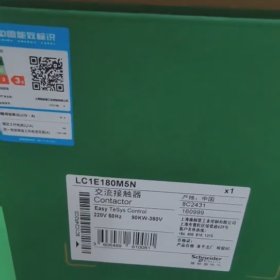
모델 해석: LC1 designates a contactor; E represents the TeSys E series; 180 indicates the rated current; M means the control coil voltage is 220V AC; 5 denotes the coil frequency of 50Hz; N signifies that the product complies with Chinese standards.
Brand: 슈나이더
극수: 3피
주요 연락처: 3아니요 (Three Normally Open)
Technical Parameters
Rated Operational Current: 18에이 (AC-3 duty category)
Rated Operational Voltage: ≤690V AC (50/60헤르츠)
Control Coil Voltage: 220뷔와
Coil Frequency: 50헤르츠
전기적 수명: Long electrical life under AC-3 duty category
기계적 수명: 최대 10 백만 개의 작업
장착 방법: Supports DIN rail mounting and base plate mounting
보호 등급: IP20, preventing direct finger contact
Product Features
Long Service Life: Boasts a mechanical life of up to 10 million operations and a high electrical life, reducing replacement frequency.
Strong Adaptability: Treated with “TH” protection, enabling operation in humid and hot environments.
Wide Voltage Tolerance: The coil control voltage can fluctuate within the range of 85%-110% Uc without affecting the product’s normal operation.
High Versatility: Equipped with a universal coil compatible with 50Hz-60Hz frequencies.
모듈형 디자인: Auxiliary contact blocks, on-delay/off-delay contact blocks, mechanical interlocks and other modules can be attached to the main unit. It can also be easily assembled into reversible contactors and star-delta starters.
Application Fields
Suitable for AC loads with a power factor of ≥0.95. It can be used to make and break normally-started squirrel-cage motors, as well as control electrical loads such as factory equipment, electric heaters, machine tools and various power units.
Installation Guide for Schneider LC1E180M5N Contactor
- 설치 전 준비
- Check Product Specifications
Verify the model: LC1E180M5N (TeSys E series, rated current 180A, coil voltage 220V AC, 50헤르츠)
Inspect the appearance for no damage and ensure the arc chute is intact
Confirm the environment is dry, well-ventilated, free of corrosive gases, with an ambient temperature range of -5℃~+40℃
- Prepare Tools and Materials
Insulated tools (전압 테스터, insulated gloves)
Screwdrivers (matching terminal screws)
Torque wrench (recommended torque range: 4-6N·m)
Cables (main circuit: 10-50mm²; control circuit: 1-2.5mm²)
Cable terminals
Mounting rail (35mm DIN standard) or mounting plate
- Safety Precautions
DANGER! Risk of electric shock, explosion or arc flash
All power supplies must be disconnected, locked and tagged in accordance with the LOTO (Lockout/Tagout) procedure before installation, wiring or commissioning
– Verify the absence of voltage with a voltage detection device before operation; never rely solely on instrument displays
– Installation operations shall only be performed by qualified electrical personnel
– Wear appropriate PPE (Personal Protective Equipment) including insulated gloves and safety goggles
– Do not open the arc chute or touch live parts while the contactor is in operation
III. 설치 단계
- Contactor Fixing
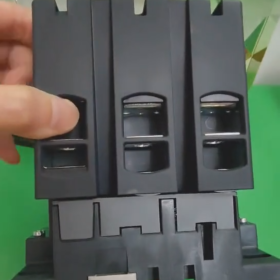
DIN Rail Mounting:
- Align the rail clips on the back of the contactor with the 35mm DIN rail
- Press down firmly until a “click” sound is heard, indicating the contactor is locked in place
- To remove, gently pry the clips with a screwdriver to release the contactor
Base Plate Mounting:
- Secure the contactor using 4 M6 screws through the mounting holes at the bottom of the unit
- Ensure the mounting surface is flat and the contactor is installed vertically (tilt angle <5°) to facilitate heat dissipation
- Main Circuit Wiring (Three-phase System)
| Terminal Marking | Connection Content | 설명 |
| L1/L2/L3 | Three-phase power supply input | Connect to the output terminal of the circuit breaker or fuse |
| T1/T2/T3 | Load output (e.g. 모터) | Connect to the motor or other electrical loads |
Operation Steps:
- Strip the cable insulation layer to a length of approximately 10-15mm
- Install appropriate cable terminals and crimp them securely
- Insert the cable terminals into the corresponding terminal holes and tighten the screws to the specified torque (4-6N·m)
- It is recommended to use phase barriers to enhance phase-to-phase insulation, especially for high-current applications
- Control Circuit Wiring
| Terminal Marking | Connection Content | 설명 |
| A1 | Control power supply live wire (엘) | Connect to the start signal of the control circuit |
| A2 | Control power supply neutral wire (N) | Connect to the common terminal of the control circuit |
| 보조 연락처 (13-14/21-22) | Signal feedback or interlocking | 선택 과목, used for status indication or interlock control |
Typical Control Circuit Connection (Self-locking Control):
- Control power supply → Stop button (평상시 닫혀 있음) → Start button (평상시 열려 있음) → Contactor terminal A1
- Terminal A2 → Control power supply neutral wire
- Connect the auxiliary normally open contact of the contactor in parallel with the start button (to achieve self-locking)
- Accessory Installation (선택 과목)
Auxiliary Contact Blocks (e.g. LAEN series):
Clip the module onto the side of the contactor until a “click” sound is heard, indicating proper installation
Overload Relay (LR E series is recommended):
Mount directly below the contactor and secure with clips; the connection wires are pre-wired internally
- Commissioning and Testing
- Wiring Inspection
Confirm all connections are tight, with no looseness or short circuits
Check that the terminal screw torque meets the requirements
Verify the phase sequence is correct (L1-L2-L3 corresponding to motor rotation direction)
- No-load Test (Without connecting the load)
Turn on the control power supply and test the contactor’s closing and opening actions
Observe if the coil overheats or produces abnormal noise
Check if the auxiliary contacts operate correctly (measure with a multimeter if necessary)
- Load Test
Ensure the main circuit power supply is disconnected and perform an inching test first
Gradually increase the load and monitor the contactor’s temperature rise (not exceeding 60K) and operating noise
Test the overload protection function (if an LR E relay is installed)
- Maintenance Recommendations
Regular Inspection (once a month):
Check if terminal connections are loose (especially in vibrating environments)
Inspect contact wear condition (if contact wear indicators are available)
Check if the arc chute is damaged
Monitor for abnormal operating temperatures
Cleaning and Maintenance:
Disconnect the power supply before cleaning dust; do not use solvents to clean internal circuits
Ensure ventilation channels are unobstructed
- 문제 해결
| Problem | 가능한 원인 | 솔루션 |
| Contactor fails to close | No voltage/insufficient voltage at the coil | Check the control power supply and circuit connections |
| Coil damage | Replace the contactor | |
| Excessive operating noise | Contaminated/oxidized iron core contact surfaces | Clean the iron core contact surfaces |
| Unstable power supply voltage | Check power supply quality | |
| Overheating of contacts | 접촉불량 | Retighten the terminals (pay attention to the specified torque) |
| Excessive load current | Check if the load exceeds the rated value |
Ⅶ. 요약
The key to the correct installation of the LC1E180M5N contactor lies in: safe power-off, proper fixing, secure wiring and comprehensive testing. Following this guide not only ensures the reliable operation of the equipment but also extends its service life. 설치 후, please keep the product label and installation records for future maintenance and inspection.
메모: This guide applies to the Schneider LC1E180M5N contactor and other models in the same series (LC1E120-LC1E630).


")


NH42-63-318x560.png "CHINT PC형 자동절환스위치 (ATS)NH42-63/4SZ")

")

