 Contactor,circuit breaker,solar inverter,electric meter,solar batteries

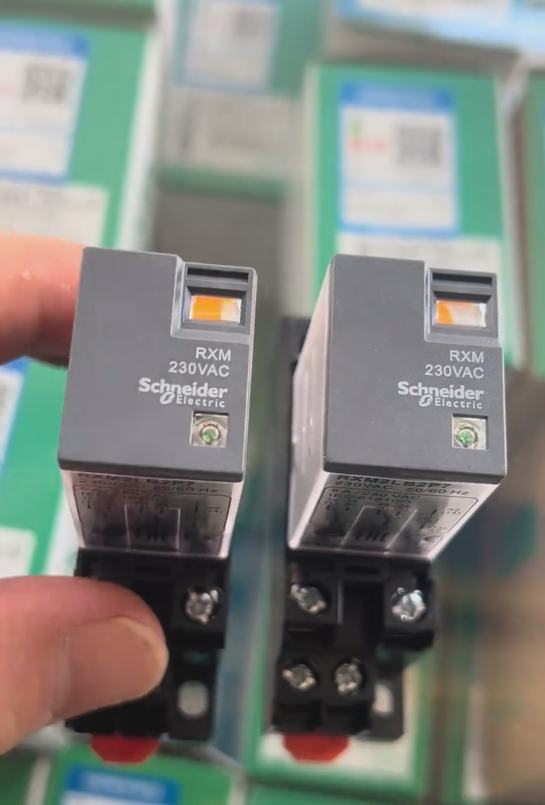

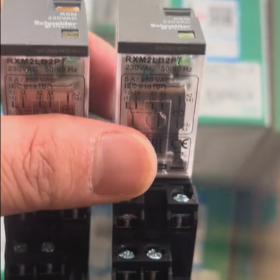


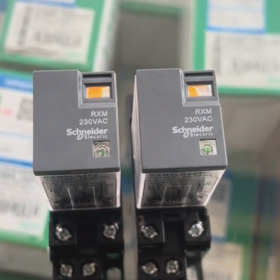
The RXM2LB2P7 is a compact plug – in intermediate relay manufactured by Schneider Electric. It is usually used in conjunction with the relay unit itself, rather than being a standalone relay socket.
Below is its detailed description:
Product Series: Belongs to the Zelio RXM2L series.
Contact Type: Equipped with 2 change – over contacts (2C/O), namely including 2 normally open contacts (NO) and 2 normally closed contacts (NC).
Coil Voltage: The control coil voltage is 230V AC, with a frequency of 50/60Hz.
Rated Current: The standard enclosed thermal current is 5A. The rated operating current varies under different load conditions. For example, under AC – 1/DC – 1 loads, the normally open contact (NO) is 5A and the normally closed contact (NC) is 2.5A; under DC – 13 load at 28V, the NO is 1A.
Electrical Performance: The rated insulation voltage is 250V, the rated impulse withstand voltage is 4kV, the maximum switching voltage is 250V AC or 28V DC, and the maximum switching capacity is 1250VA AC or 140W DC.
Other Features: It is equipped with an LED indicator for displaying the working status of the relay. The green LED lights up when the relay is in the conducting state. It has a compact overall size, with a CAD total width of 21mm, a total height of 27mm, a total depth of 46mm, and a net weight of 0.031kg, making it suitable for installation in space – constrained electrical control cabinets.
First, it needs to be clarified that: the RXM2LB2P7 is the compact plug – in intermediate relay unit of the Schneider Zelio RXM2L series, not a socket; its matching standard socket model is RXZE1M2C (a mixed – contact type, suitable for the RXM2L series relays with 2 change – over contacts). The following is a complete description of the installation methods of this socket.
- Core Installation Methods (RXZE1M2C Socket)
The RXZE1M2C socket offers two standard installation methods, suitable for common installation scenarios in industrial control cabinets:
- DIN Rail Mounting (Preferred)
Compatible Specification: Standard TH35mm symmetrical DIN rail (compliant with EN 60715 standard)
Installation Steps:
- Locate the rail buckle on the back of the socket and switch the buckle to the unlocked position.
- Align the upper slot of the socket with the upper edge of the rail, gently press the socket to make the lower buckle automatically snap into the rail.
- Press the buckle to the locked position to ensure the socket is firmly fixed without loosening.
Removal Steps: Toggle the buckle to the unlocked position and gently lift the socket upwards to separate it from the rail.
Features: Quick installation without tools, convenient for adjusting positions and batch arrangement in the control cabinet.
- Panel Screw Mounting
Installation Preparation: Two mounting holes are reserved on both sides of the socket, suitable for M3/M4 screws.
Installation Steps:
- Mark the corresponding hole positions on the mounting panel and drill holes (recommended hole diameter: 3.2 – 3.5mm).
- Fix the socket on the panel with screws, with a recommended tightening torque of 0.6 N·m (to avoid socket deformation).
- After the fixing is completed, the RXM2LB2P7 relay unit can be inserted.
Features: Firm installation, suitable for vibration environments or installation scenarios requiring precise positioning.
- Installation Accessories and Supplementary Instructions
| Accessory Model | Accessory Name | Function Description | Application Scenario |
| RXZ400 | Metal Retaining Clip | Enhance the mechanical fixation between the relay and the socket, anti – vibration | Vibration environments such as industrial automation and motor control |
| RXZR335 | Plastic Retaining Clip | Prevent accidental disconnection of the relay, provide basic protection | Regular control cabinets and non – vibration environments |
| RXZR315 | Mounting Bracket | Expand installation methods, suitable for special installation positions | Installation at panel edges and narrow spaces |
III. Installation Key Points and Precautions
- Before Installation: Disconnect all power supplies to ensure safe operation.
- Relay Insertion: Align the RXM2LB2P7 relay with the socket pins, press vertically downward until a “click” sound is heard to confirm it is locked in place.
- Contact Load: The rated enclosed thermal current of the socket is 7A, which is compatible with the 5A rated operating current of the RXM2LB2P7, with sufficient margin.
- Space Requirement: The width of the socket is 22.5mm. It is recommended that the spacing between adjacent components during installation should be ≥5mm to ensure heat dissipation and wiring space.
- Wiring Method: The socket adopts screw terminal connection, suitable for wire specifications of 0.2 – 2.5mm² (AWG 24 – 14).
- Matching Relationship Between Socket and Relay
| Relay Model | Matching Socket Model | Contact Configuration | Installation Compatibility |
| RXM2LB2P7 | RXZE1M2C | 2 change – over contacts (2C/O) | Fully compatible, plug – and – play |
| RXM4LB2P7 | RXZE1M4C | 4 change – over contacts (4C/O) | Cannot be mixed, different socket widths |
The RXZE1M2C socket matched with the RXM2LB2P7 relay provides two core installation methods: DIN rail mounting and panel screw mounting, which are suitable for different installation requirements. The installation stability can be further improved by matching with accessories such as metal/plastic retaining clips, making it suitable for various application scenarios such as industrial automation, HVAC, and motor control.
 and 6ES7 235-0KD22-0XA8 (China CN), both hardware version 22 spare parts for S7-22X CPU maintenance.")


")


NH42-63-318x560.png "CHINT PC-type automatic transfer switches (ATS)NH42-63/4SZ")


