 Contactor,circuit breaker,sensor,Encoder,PLC,Converter

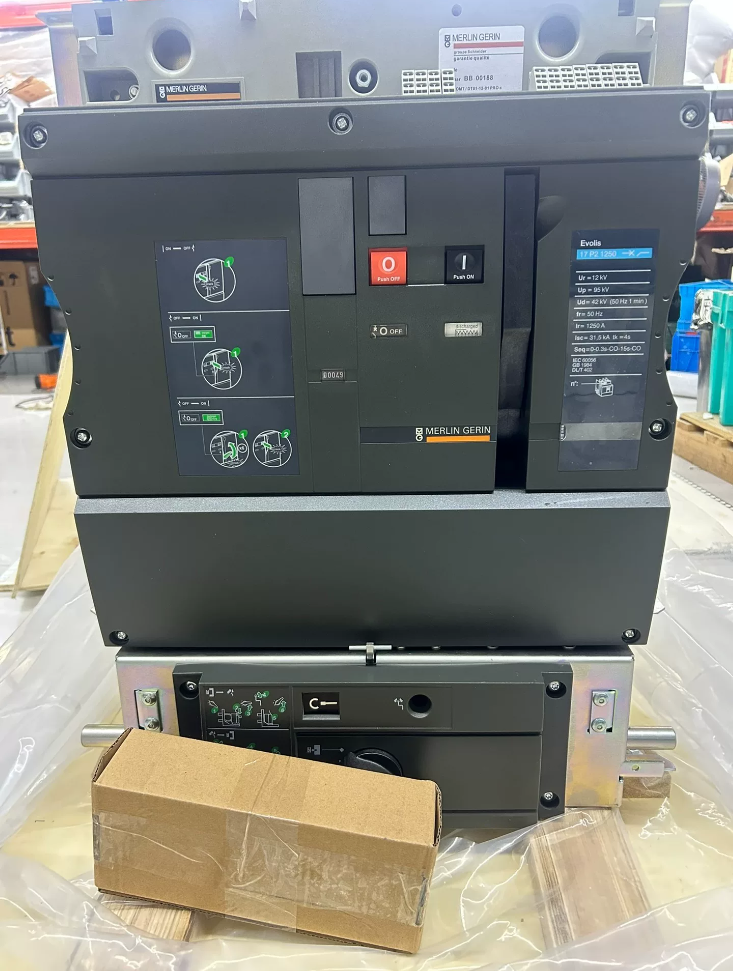

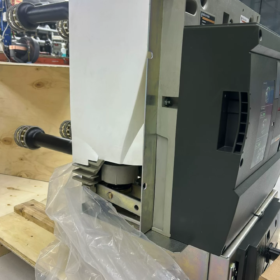
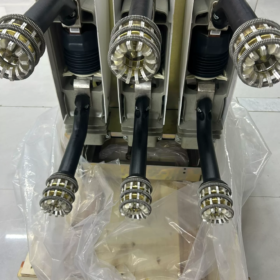
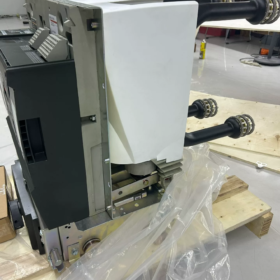
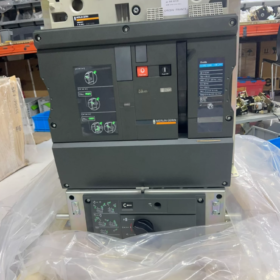
Evolis belongs to Schneider PacT series indoor medium voltage vacuum circuit breaker. It is being gradually replaced by EasyPact EXE; 1250A is the mainstream rated current specification of this series, available in fixed type / withdrawable truck type (with cradle base). It is compatible with MVnex and other medium voltage switchgears.
✅ Key Technical Specifications (12kV version, 1250A)
| Item | Parameter |
| Full Product Name | Evolis Indoor Vacuum Circuit Breaker |
| Rated Voltage Ur | 7.2 / 12 / 17.5 / 24 kV |
| Rated Current In | 1250A @ 40℃ |
| Rated Short-circuit Breaking Current Isc | 25kA / 31.5kA / 40kA (optional) |
| Rated Short-circuit Making Current Icm | Corresponding peak value: 63kA / 80kA / 100kA |
| Short-time Withstand Current Icw | 25/31.5/40kA, 3s |
| Interrupter Technology | AMF Axial Magnetic Field Vacuum Interrupter. The arc diffuses uniformly with low contact erosion, E2 electrical endurance class (IEC 62271-100) |
| Operating Mechanism | Spring charged mechanism (RI type), manual / motor charging available; coils for AC220V/DC220V/DC110V optional |
| Mechanical Endurance | 10,000 close-open cycles |
| Power-frequency Withstand Voltage | 42kV (1min); Lightning Impulse Withstand Voltage 75kV |
| Applicable Standards | IEC 62271-100, GB 1984 |
| Structure | Fixed type, withdrawable truck type; front operation / side operation versions |
| Operating Environment | Indoor, -5 ~ +40℃; anti-condensation and high-altitude versions available |
📌 Model Coding Rule (Evolis)
Example: `Evolis 12 1250 P2`
- 12: Rated voltage 12kV
- 1250: Rated current 1250A
- P1=25kA; P2=31.5kA; P3=40kA short-circuit breaking current
Optional secondary configuration: closing coil, tripping coil, charging motor, auxiliary contacts, anti-misoperation interlock (key lock), position switches, LPCT current sensors, etc.
⚙️ Core Features
- AMF Axial Magnetic Field Interrupter: The arc disperses under high short-circuit current, reducing contact wear. Suitable for frequent operation and capacitor bank switching applications.
- Modular design: Circuit breaker main body separated from truck cradle for easy cabinet integration; supports front operation and side operation layouts.
- Complete five-prevention interlocks: position interlock, mechanical interlock, key lock to prevent erroneous closing/opening and truck racking with load.
- Low maintenance: Hermetically sealed vacuum interrupter, maintenance-free. Only periodic inspection of mechanism lubrication and secondary circuit required.
- Application scenarios: 10kV/20kV industrial substations, building power distribution, data centers, plant auxiliary power, protection for transformers/cables/busbars and capacitor banks.
🛠️ Installation, Operation & Maintenance and Troubleshooting
Installation
Withdrawable truck adapts to medium-voltage cubicles. Control phase-to-phase clearance and contact alignment; apply conductive grease on tulip contacts of contact arms.
Prevent loosening of secondary connectors; verify mechanism travel and over-travel against factory records; reliable earthing required.
Routine Maintenance
- Regularly clean dust on mechanism; check charging status and close/open indicators.
- Monitor operating voltage to avoid coil under-voltage leading to failure of closing or tripping.
- Inspect vacuum interrupter for cracks; perform vacuum degree test and power frequency withstand voltage test when necessary.
Common Faults
Charging failure: Missing motor supply, mechanism jamming, faulty charging limit switch.
Failure to close: Damaged closing coil, interlock not released, spring uncharged.
Failure to trip: Broken tripping circuit, mechanism seizure.
⚠️ Vacuum interrupter cannot be disassembled on site. Replace the whole pole if vacuum fails.
📦 Replacement Options & Selection Notes
- OEM successor: Evolis (≤17.5kV) discontinued replacement model: EasyPact EXE. It covers 1250A rating and can be retrofitted into the same cubicle with minor secondary circuit modifications.
- Domestic alternative: VS1(ZN63A), ZN28 and other 12kV/1250A medium voltage vacuum circuit breakers. Need to verify truck dimension, mechanism interface and breaking capacity.
- Higher-end Schneider model: EvoPacT HVX (intelligent version with built-in mechanical characteristic and temperature monitoring).
📎 HS Code Reference
Vacuum circuit breaker (indoor medium voltage, rated voltage>1kV): 85352100 (automatic circuit breaker, voltage>1kV). State rated voltage, current and breaking capacity during customs declaration.
🔍 Second-hand Inspection Checklist (Evolis 1250A)
- Visual check: No cracks or tracking marks on poles and vacuum interrupters; no overheating discoloration on contact arms.
- Mechanical test: Manual and motor charging; 10 consecutive close-open operations. Verify position indicators and interlock functions.
- Electrical test: Measure coil resistance; contact resistance test; vacuum degree test and power frequency withstand voltage test.
- Mechanism inspection: Compare closing/tripping speed, travel and over-travel with factory curve; check charging springs for corrosion and fatigue.
- Documentation: Verify nameplate parameters and factory test report, confirm breaking class P1/P2/P3.
Schneider Evolis VCB 1250A (Withdrawable Type) Operating Instructions
⚠️ Safety Precondition: Operated only by certified high-voltage electricians; strictly follow five-prevention interlock rules; racking in/out of truck must be performed when CB is in open position; wear insulating PPE before operation. Applicable to Evolis spring-operated vacuum circuit breaker for MVnex switchgear, 1250A.
Panel marking: O=Open (OFF), I=Close (ON); Spring charging indicator: Charged / Discharged; Operation counter records close-open cycles.
- Three Truck Positions Definition
- Working Position (Connected Position): Truck fully racked in, primary main circuit connected, secondary connector engaged. Remote/local close/open available, normal operating position.
- Test Position: Primary main circuit disconnected, secondary connector still connected. Mechanism and secondary circuit test available; high voltage shutter closed for isolation.
- Removed Position: Truck fully pulled out from cubicle, secondary connector disconnected. Available for transportation and overhaul.
Mechanical interlock: Truck cannot be racked in or out when CB is closed; truck is locked out from working position if earthing switch is closed.
- Spring Charging Operation (Mandatory before closing)
Evolis adopts spring charged mechanism with motor charging and manual charging.
1) Motor Charging (Standard MCH charging motor)
Once secondary control circuit energized, motor automatically charges the spring. When fully charged, panel shows Charged and motor stops automatically. Manual charging required upon power loss.
2) Manual Charging (Power-off overhaul & test)
- Open the front access cover for charging operation.
- Insert charging handle and pull down repeatedly (approx. 6 times) until a “click” locking sound is heard.
- Check panel indicator changes to Charged, remove charging handle, charging completed.
Once charged, spring remains charged as long as CB does not close. Energy releases instantly upon closing; recharging is required for another closing operation.
- Tripping Operation (Local / Remote, tripping has priority)
✅ Local Mechanical Trip (Panel pushbutton, operable without power supply)
Directly press red O (Trip) pushbutton on front panel, circuit breaker trips immediately. Check mechanical indicator points to O; charging indicator shows discharged after closing and tripping.
✅ Electrical Tripping
- Local trip pushbutton on switchgear panel
- Remote tripping via protection / SCADA
- Fault tripping triggered by protection devices (overcurrent, instantaneous overcurrent etc.)
Tripping does not require spring charging. Tripping can be executed regardless of charging status.
- Closing Operation (Prerequisite: Spring Charged + CB in Open Position)
✅ Local Mechanical Closing (Panel I pushbutton)
- Confirm: CB open, spring charged, all interlock conditions released (truck in position, no lock, protection reset).
- Press I (Close) pushbutton on panel, CB closes. Spring releases energy after closing; charging indicator becomes Discharged and mechanical indicator points to I.
Built-in mechanical anti-pumping function: CB closes only once even if close button is held continuously. Release close command and recharge spring for next closing.
✅ Electrical Closing
Local closing pushbutton on switchgear
Remote closing via background control
Prerequisite for electrical operation: intact secondary circuit, no interlock blocking, spring charged, CB in open position.
- Racking Truck In (Test Position → Working Position, Energizing Operation)
Prerequisite: CB at O open position, earthing switch open, cubicle door closed, secondary connector fully engaged.
- Take out dedicated racking crank and insert into truck racking socket.
- Hold position release button, rotate crank clockwise to move truck inward.
- Continue racking until truck latches and crank cannot turn, accompanied by “click” locking sound.
- Remove crank; verify position indicator shows 【Working Position】.
- Charge spring, close CB and energize for service.
- Racking Truck Out (Working Position → Test Position, De-energizing Operation)
Prerequisite: Trip CB to O position first.
- Confirm CB opened and load disconnected.
- Insert crank, hold release button, rotate crank counter-clockwise to withdraw truck.
- Rack to test position until mechanism locks and crank stops turning with locking sound.
- Remove crank; position indicator shows 【Test Position】.
Mechanism test can be performed at test position. For full removal of CB for maintenance: open cubicle door, unplug secondary connector and pull out breaker with transport trolley.
- Mechanical Lock / Padlock Operation (Anti-misoperation for Maintenance)
- Closing pushbutton can be mechanically locked in open state to prohibit closing.
- Truck position can be padlocked at test / working position to prevent racking.
- Optional key interlock: key interlock between earthing switch and CB position to meet five-prevention requirements.
- Primary shutter interlock: High voltage static contact shutter automatically closes after truck withdrawal to prevent accidental contact with live parts.
- Standard Complete Operation Sequence Examples
Energizing Sequence (Cold standby to service)
- Inspect CB: open, spring discharged, truck at test position, earthing switch open.
- Connect secondary connector and close cubicle door.
- Manual / motor charging → indicator shows Charged.
- Rack truck clockwise into working position, remove crank.
- Local / remote close → CB put into service.
De-energizing & Maintenance Sequence (Service to maintenance state)
- Trip CB locally or remotely, confirm CB open and load de-energized.
- Rack truck counter-clockwise to Test Position, remove crank.
- Disconnect secondary circuit and unplug secondary connector.
- Close earthing switch for maintenance earthing.
- Pull out CB body with transport trolley if full removal required.
- Prohibited Operations (Key Points)
❌ Rack truck in/out forcibly while CB is closed
❌ Attempt closing with uncharged spring (closing cannot be achieved)
❌ Rack truck into working position while earthing switch is closed
❌ Open CB compartment door while energized (mechanical interlock will block)
❌ Place hands within truck moving area or primary contact zone during operation
❌ Disassemble vacuum interrupter on site
- Post-operation Inspection Items
- Cross-check mechanical position indication (open/close, truck position) matches remote SCADA signals.
- Spring charging indicator status correct.
- Operation counter increments by 1.
- Check for abnormal noise, mechanism jamming and loose secondary terminals.
Schneider Evolis VCB 1250A Vacuum Circuit Breaker Faults & Troubleshooting
⚠️ Safety Reminder: Fault investigation of high-voltage equipment must be performed after de-energization, voltage test and earthing, operated by certified high-voltage electricians. Distinguish electrical faults and mechanical faults. Vacuum interrupter cannot be disassembled on site; replace the whole pole when vacuum fails. Applicable to Evolis 12kV 1250A spring-operated withdrawable VCB.
- Charging Faults (MCH Motor Charging System)
Fault 1: Charging motor fails to start, no Charged indication on panel
Symptom: Motor does not run after energization, spring remains uncharged, closing impossible
Causes
- Missing motor control supply, blown fuse, loose terminals; control voltage lower than 85% Un
- Damaged/oxidized/misaligned charging limit switch
- Worn motor carbon brush, open/short-circuited winding; thermal protection tripped
- Mechanical seizure: corroded gears, sticking connecting rods, jammed spring
Remedies
- Measure motor supply voltage, tighten secondary terminals and replace blown fuse.
- Test charging circuit separately at test position, check continuity of limit switch.
- Measure motor winding resistance; replace worn carbon brush; reset thermal protection.
- Clean mechanism, apply Schneider specified grease to transmission components; overhaul or replace if mechanically seized.
Fault 2: Motor keeps idling and cannot complete charging
Symptom: Motor runs continuously and cannot lock into charged state, no auto-stop
Causes: Limit switch fails to switch over, slipping transmission gear, fatigued and deformed charging spring
Remedies: Adjust mounting position of limit switch; inspect gear wear; replace spring assembly if fatigued.
Fault 3: Manual charging handle hard to pull, heavy feeling
Causes: Corroded mechanism, insufficient lubrication, deformed connecting rod, foreign object jamming
Remedies: Clean mechanism and apply designated lubricant; replace deformed connecting rod. Do not pull handle violently.
- Closing Faults (Failure to close, spring fully charged but cannot close)
Pre-check: Spring Charged, CB in open position, truck at working/test position, all five-prevention interlocks released
Fault 1: Electrical closing fails locally and remotely, but mechanical I pushbutton can close
Causes: Broken closing circuit, burnt closing coil, poor auxiliary contact, faulty anti-pumping relay, protection blocking closing
Remedies
- Measure DC resistance of closing coil (compare with nameplate reference value). Replace coil if open or short-circuited.
- Check switching status of auxiliary switch and secondary terminals, clean oxidized contacts.
- Check blocking signal from protection device (e.g. uncleared fault trip signal), reset protection.
Fault 2: Closing fails even with mechanical pushbutton
Causes: Seized closing latch, worn closing trip dog, interlock not released (earthing switch closed, truck not fully seated, closing locked by key)
Remedies
- Verify five-prevention status: earthing switch must be open, truck fully seated, mechanical closing lock released.
- Perform manual charging and repeated close test at test position to observe latch seizure; replace worn trip dog.
- Check whether tripping latch stays in half-tripped state after fault trip.
Fault 3: Immediately trips after closing (closing leads to instant trip)
Causes: Protection tripping, continuously energized tripping circuit, failed anti-pumping, undervoltage coil de-energized
Remedies: Check protection event and oscillography; check continuous energization of shunt trip circuit; verify undervoltage coil supply.
Fault 2: Cannot trip even by mechanical button (serious fault, manual release fails)
Causes: Jammed tripping latch, deformed transmission connecting rod, corroded and seized mechanism
Remedies: Do not press button forcibly. Disassemble and inspect mechanism after power cut at test position; return whole unit to factory if necessary.
Fault 3: Spontaneous tripping without operation (nuisance trip)
Causes:
- False tripping of protection (overcurrent, earth fault, zero sequence false alarm, CT secondary open circuit)
- Secondary circuit interference, damaged cable insulation with earth fault
- Accidental latch release caused by mechanism vibration
- Loss of supply to undervoltage coil
Remedies: Retrieve protection event log; inspect CT secondary circuit; troubleshoot undervoltage supply; tighten loose mechanism parts.
- Truck Racking Faults (Withdrawable type only)
Fault 1: Crank cannot turn when CB closed (normal five-prevention interlock)
Cause: CB at closed position, mechanical interlock locks truck (normal protection, not a fault)
Remedy: Trip CB to open position before racking truck.
Fault 2: Truck still cannot be racked even with CB open
Causes:
- Position release button not held down
- Earthing switch closed, five-prevention interlock locked
- Foreign objects on truck guide rail, seized tulip contacts, deformed truck frame
- Incomplete insertion of secondary connector triggers interlock blocking
Remedies
- Confirm earthing switch open, hold release button while racking.
- Clear foreign objects on guide rail; inspect tulip contacts for deformation and overheating adhesion.
- Ensure secondary connector fully seated.
Fault 3: Position indicator inconsistent with actual truck position
Causes: Misaligned position limit switch, loose connecting rod
Remedies: Adjust auxiliary position switch, calibrate position signal and tighten connecting rod.
- Primary Circuit, Pole & Vacuum Interrupter Faults
Fault 1: Excessive contact resistance, overheating on contact arm / pole during operation
Symptom: Abnormal temperature rise, infrared temperature measurement out of limit
Causes: Oxidized tulip contact, dried conductive grease, loose contact arm bolt, eroded vacuum interrupter contacts
Remedies
- Power off and withdraw truck, clean tulip contacts, re-apply conductive grease and tighten bolts to specified torque.
- Re-test contact resistance. If still over-limit, inspect vacuum interrupter and replace pole if contacts severely eroded.
Fault 2: Degraded vacuum inside vacuum interrupter (high-risk fault)
Symptom: Breakdown during power frequency withstand voltage test, excessive partial discharge, hissing abnormal sound
Causes: Aging bellows of vacuum interrupter, crack from impact, seal failure
Remedies: Vacuum failure cannot be repaired. Replace complete pole assembly. Do not disassemble vacuum interrupter on site.
Fault 3: Tracking and flashover on pole surface, discharge on insulator surface
Causes: Humidity, heavy dust, condensation, contamination on insulation surface, insufficient derating for high altitude application
Remedies: Clean insulation surface of poles; install cabinet heater for anti-condensation; replace pole if carbonization is severe.
- Secondary Signal & Indication Abnormality
Fault 1: Mechanical close/open indicator normal but remote SCADA signal wrong
Causes: Worn/oxidized auxiliary switch contacts, loose secondary wiring
Remedies: Perform continuous close-open cycles at test position and monitor auxiliary switch continuity; replace damaged auxiliary switch.
Fault 2: Charging signal inconsistent with panel indicator
Causes: Poor contact of charging limit auxiliary switch, loose secondary wire terminals
Remedies: Inspect charging limit switch and tighten terminals.
- Abnormal Noise & Mechanism Sound
- Abnormal noise during charging: Gear insufficient lubrication, wear, spring interference → clean and lubricate, replace damaged parts.
- Excessive closing impact sound: Failed closing/tripping buffer → inspect buffer and replace damper.
- Hissing discharge sound inside pole during operation → cut off power immediately and perform partial discharge and vacuum degree test.
✅ General Troubleshooting Sequence (Recommended)
- Observation: Panel mechanical indication, charging status, protection alarms, remote signals.
- Distinguish mechanical fault or electrical fault
If mechanical pushbutton works → mostly secondary circuit / coil issue
If mechanical pushbutton also fails → mechanism / interlock issue
- Perform mechanism test separately at test position with high voltage isolated, avoid live test operation.
- Instruments to use: Contact resistance tester, megohmmeter, circuit breaker analyzer (closing/tripping speed, simultaneity, contact bounce).
- Record fault phenomenon and test data, compare with factory report.
❌ Prohibited Operations
- Disassemble mechanism or pole while energized
- Keep CB in service if vacuum degradation is suspected
- Force racking truck or press close button violently when mechanism is seized
- Randomly adjust contact over-travel and contact gap (must follow Evolis factory parameters)
Supplement: List of Consumable & Vulnerable Parts (Evolis)
MCH charging motor, closing & tripping coils, auxiliary switch, charging spring, latch/trip dog, buffer, tulip contacts, vacuum interrupter pole assembly


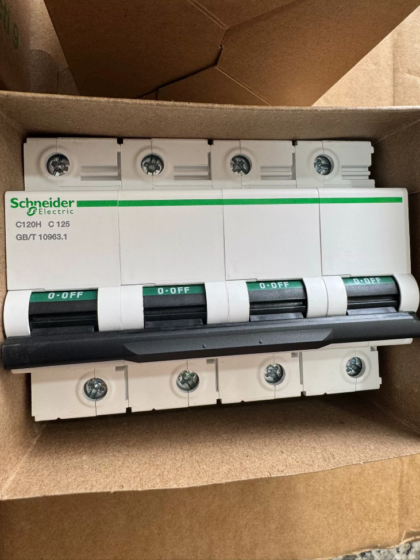




NH42-63-318x560.png "CHINT PC-type automatic transfer switches (ATS)NH42-63/4SZ")



