


Delicioso Contatores CA são dispositivos de controle elétrico comumente usados. Eles podem ser usados para conectar e desconectar frequentemente circuitos CA e CC e são amplamente aplicados em sistemas de acionamento elétrico e controle automático.. A seguir são apresentados métodos de fiação comuns para contatores Delixi AC.
Estrutura e Terminais de Fiação do Contator ACPreço dos disjuntores Schneider
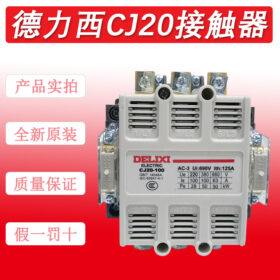
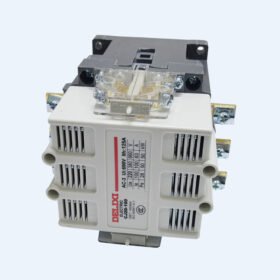
Os contatores Delixi AC são compostos principalmente de contatos principais, contatos auxiliares, bobinas, etc.. Os terminais de fiação comuns são os seguintes:
Principais Contatos: Geralmente, `L1`, `L2`, e `L3` representam os terminais de entrada, enquanto `T1`, ``T2'', e `T3` representam os terminais de saída. Eles são usados para conectar e desconectar o circuito principal e podem transportar correntes relativamente grandes.
Contatos Auxiliares: Eles são divididos em contatos normalmente abertos (NÃO) e contatos normalmente fechados (NC), que são usados para transmissão de sinal e controle de intertravamento no circuito de controle.
Bobina: Geralmente representado por `A1` e `A2`. Quando a bobina está energizada, os contatos principais e auxiliares do contator atuarão de acordo.
Exemplos comuns de fiaçãoDisjuntores CC da série NB163DC da Chint Preço
- Fiação para partida e controle de um único motor
Este é o cenário de aplicação mais comum, usado para controlar a partida e parada de um único motor.
Materiais necessários: Contator CA Delixi, disjuntor, relé térmico, botão iniciar, botão parar, e motor.
Etapas de fiação:Preço dos relés de sobrecarga térmica da série Chint NXR
- Linha de entrada de energia: Conecte os terminais de saída do disjuntor aos terminais de entrada `L1`, `L2`, e `L3` dos contatos principais do contator AC.
- Conexão do Circuito Principal: Conecte os terminais de saída `T1`, ``T2'', e `T3` dos contatos principais do contator CA para os terminais de entrada do relé térmico, e conecte os terminais de saída do relé térmico ao motor.
- Conexão do Circuito de ControlePreço do contator CHINT:
Desenhe uma linha de controle do terminal de saída do disjuntor e conecte-a a uma extremidade do botão de parada.
Conecte a outra extremidade do botão de parada a uma extremidade do botão de partida, e conecte a outra extremidade do botão iniciar a uma extremidade `A1` da bobina do contator CA.
Conecte o contato auxiliar normalmente aberto do contator CA em paralelo com o botão de partida para obter uma função de travamento automático.
Conecte a outra extremidade `A2` da bobina do contator CA a uma extremidade do contato normalmente fechado do relé térmico, e conecte a outra extremidade do contato normalmente fechado do relé térmico à outra fase da fonte de alimentação.
- Fiação para controle de avanço e reversoPreço do protetor contra surtos CHINT:
É usado para controlar a rotação direta e reversa do motor, geralmente exigindo dois contatores CA.
Materiais necessários: Dois contatores AC Delixi, disjuntor, relé térmico, botão de rotação para frente, botão de rotação reversa, botão parar, e motor.
Etapas de fiação:
- Conexão do Circuito Principal: Conecte os terminais de saída do disjuntor aos terminais de entrada dos contatos principais dos dois contatores CA, respectivamente. Após inverter a sequência de fases dos terminais de saída dos contatos principais dos dois contatores CA, conecte-os aos terminais de entrada do relé térmico, e conecte os terminais de saída do relé térmico ao motor.
- Conexão do Circuito de Controle:
Desenhe uma linha de controle do terminal de saída do disjuntor e conecte-a a uma extremidade do botão de parada.
Conecte a outra extremidade do botão de parada a uma extremidade do botão de rotação para frente e a uma extremidade do botão de rotação reversa, respectivamente.
Conecte a outra extremidade do botão de rotação direta a uma extremidade `A1` da bobina do contator CA de rotação direta. Conecte o contato auxiliar normalmente aberto do contator CA de rotação direta em paralelo com o botão de rotação direta. Enquanto isso, conecte o contato auxiliar normalmente fechado do contator CA de rotação direta em série no circuito de controle da bobina do contator CA de rotação reversa.
Conecte a outra extremidade do botão de rotação reversa a uma extremidade `A1` da bobina do contator CA de rotação reversa. Conecte o contato auxiliar normalmente aberto do contator CA de rotação reversa em paralelo com o botão de rotação reversa. Enquanto isso, conecte o contato auxiliar normalmente fechado do contator CA de rotação reversa em série no circuito de controle da bobina do contator CA de rotação direta.
Conecte a outra extremidade `A2` das bobinas de ambos os contatores CA a uma extremidade do contato normalmente fechado do relé térmico, e conecte a outra extremidade do contato normalmente fechado do relé térmico à outra fase da fonte de alimentação.
Precauções com fiação
Desligamento seguro: Certifique-se de desligar a energia antes de fazer a fiação para evitar acidentes com choque elétrico.
Confirme a tensão: Certifique-se de que a tensão nominal da bobina do contator seja consistente com a tensão da fonte de alimentação do circuito de controle.
Fiação Correta: Faça a fiação estritamente de acordo com o diagrama de fiação e o manual do produto para garantir a conexão correta dos contatos principais, contatos auxiliares, e bobinas.
Aperte os terminais: Depois da fiação, verifique se todos os terminais de fiação estão apertados para evitar mau contato causado por afrouxamento.


")


NH42-63-318x560.png "Chaves de transferência automática tipo PC CHINT (ATS)NH42-63/4SZ")

")

